In WordPress, the core platform does not handle the design. Instead, it uses themes (or design templates) to manage the appearance of the blog website.
The theme determines how your WordPress site looks, including the content elements. Apart from the design, it also controls some aspects of user experience and functionalities such as featured images, menus and more.
WordPress comes with a default theme (or a set of default themes). You should change the default theme based on your blog’s subject and audience preferences.
How to Install WordPress themes?
WordPress maintains an official repository of WordPress themes that are developed by the community and made available under free GPL license. All the themes on WordPress.org undergo review before being made available to WordPress users.
Pro Tip: Never download and install WordPress themes and plugins from unreliable sources. If you need a premium theme design, pay for it. Don’t risk with nulled or illegal theme downloads. Such files are often injected with malicious codes.
Here’s how to install a WordPress theme from the official WP themes repository.
- Log in to WordPress admin dashboard.
- Go to the Appearance > Themes setting page.
- Click on the Add New button on the themes page.
- Browse or search for an appropriate theme.
- Hover on the theme box to open up options.
- Click on the Details & Preview button to check. (Preview is with dummy content.)
- Click on the Install button to download the theme on your site.
- Once the theme is installed, click on the “Live Preview”.
- During the Live Preview, you can customize the theme settings using the customizer panel.
- When you find the right theme, click on the “Activate & Publish” button.
The above process is for downloading and using a theme from WordPress.org repository.
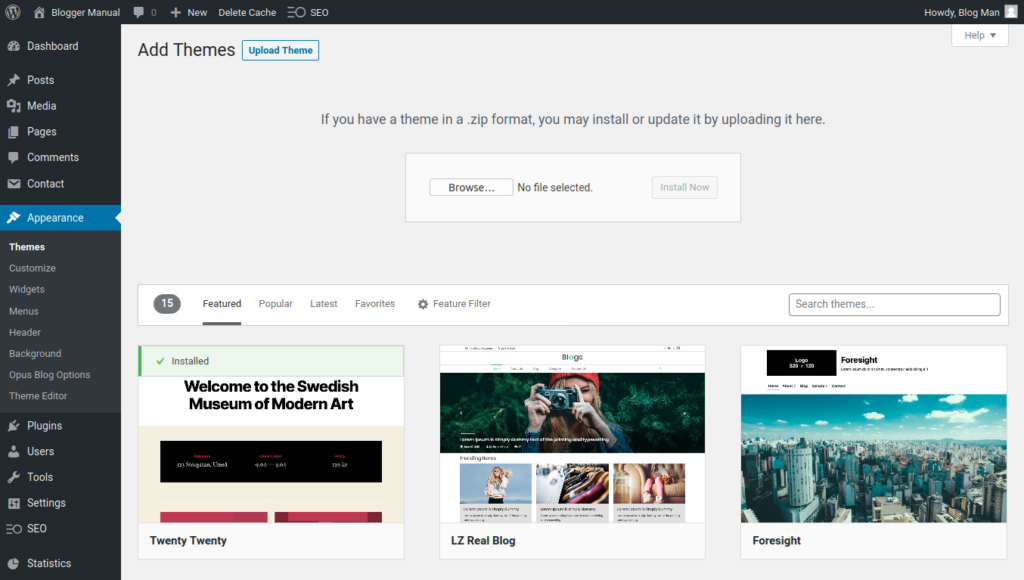
You can also upload and activate a WordPress theme packaged in as a ZIP file. Here are the steps to install (or update to a newer version) a WordPress theme via file upload option.
- Log in to WordPress admin dashboard.
- Go to the Appearance > Themes setting page.
- Click on the Add New button on the themes page.
- On the Add Themes page, click on the Upload Theme button.
- If you have a theme in a .zip format, you may install or update it by uploading it here.
- Select the ZIP file from your computer, and wait for the upload to finish.
- The theme will be installed and a success page will appear with the links to activate the theme or preview it. Click on the “Live Preview” link.
- During the Live Preview, customize the theme settings using the customizer panel.
- When done, click on the “Activate & Publish” button.
How to Manage WordPress Themes?
When you already have a theme installed on your website, you will find the theme listed on your Themes page.
If you want to change the theme, go to the Appearance > Themes page, and locate the installed theme that you want to activate. You can activate the theme directly from here or check the theme in Live Preview.
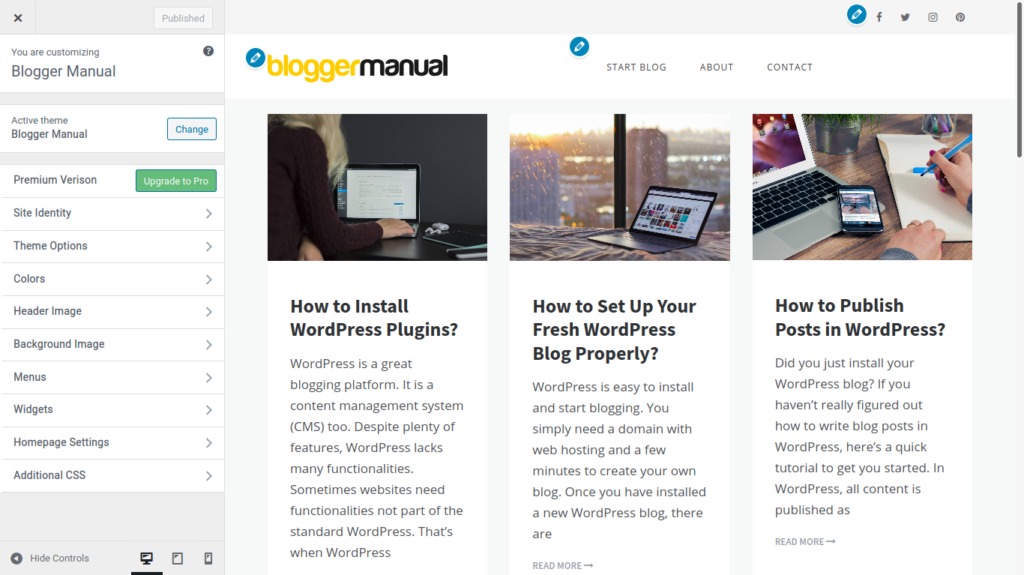
You can customize your WordPress website appearance using the customizer panel.
- Log in to WordPress admin dashboard.
- Go to the Appearance > Customize page.
- The customizer opens a live preview with settings panel.
- Change the settings until you are satisfied with the result.
- Click on the “Publish” or “Activate & Publish” button.
With WordPress version 5.5 onward, you can turn automatic updates on for themes and plugins. When you enable auto-updates for themes and plugins, you significantly reduce the chances of hacking or sabotaging your website.
Though rare, some themes or plugins may break your website when updated. You have been warned in advance so that you only enable auto-updates for the right ones.