
Any website or blog basically has two components: 1) domain or website address, and 2) web hosting server that stores and serves the website.
Domain is simply the name of the website. Each website is hosted on a server (computer) where all the files and database of the website. Web servers, on request, send the website to the users’ web browsers.
When you register a domain, it isn’t pointing to your website. Most domain registrars point your domain to a default page which shows some information and / or advertisements.
Most hosting providers configure the domain to your hosting space automatically if you buy web hosting along with domain registration.
If your domain name and web hosting is not connected, you need to configure the domain to take visitors to your website (server).
Domain Name System (DNS)
The Domain Name System (DNS) is the address book of the Internet.
Domain names are human readable addresses, but computers use Internet Protocol (IP) addresses to connect and communicate. When we access any website, web browsers (Firefox, Chrome, Opera) communicate with the host computer identified by IP addresses.
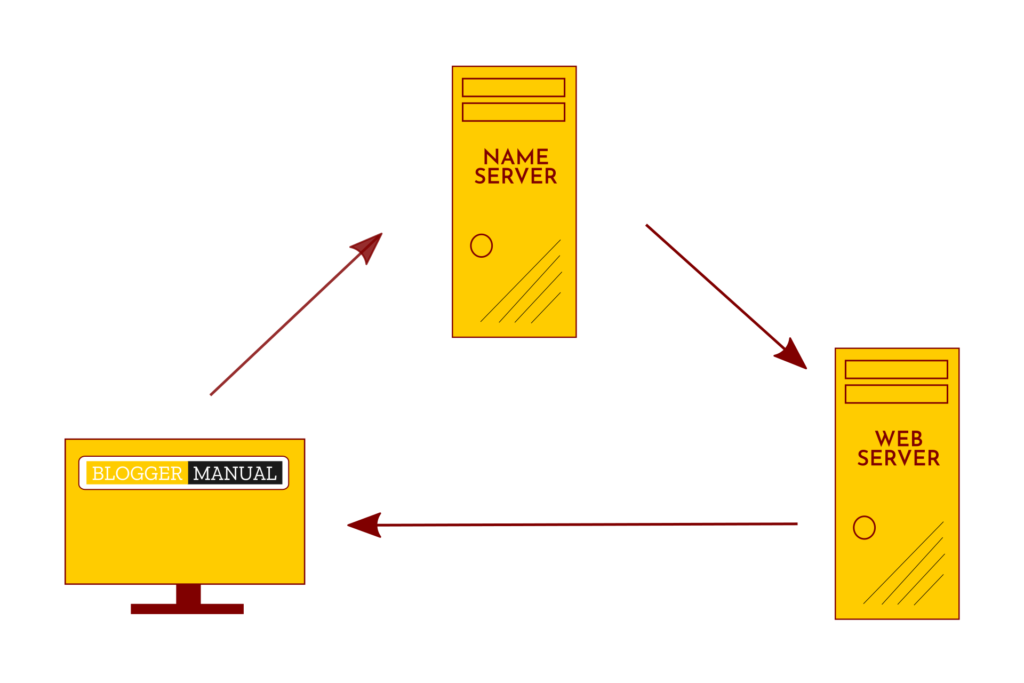
DNS translates domain names to IP addresses so browsers can load the website resources.
Domain Name System (DNS) maintains a directory for devices and the IP addresses attached to them. Name servers, which are a part of the DNS, convert domain names into numerical IP addresses that computers understand.
In simple terms, name servers are the interpreters bridging the language barrier between humans and computers.
Each domain name is assigned name servers, which maintain a record for IP addresses (as well as domains and sub-domains) of the web servers that handle different requests. Name servers assigned to a domain can be maintained by domain registrar, hosting provider or any other service provider (content delivery network, or CDN).
Though the average blogger has no clue about all these technicalities, let’s try to gain as much knowledge as we can. It is going to be really helpful in handling our websites.
Here are the common DNS records that you maintain and manage with your name server. In most cases, you need to work with NS (Name Server) and CNAME entries. There records can be updated with the name server assigned to your domain.
A (Host server address)
AAAA (IPv6 host server address)
ALIAS (Auto resolved alias)
CNAME (Canonical name for an alias)
MX (Mail eXchange)
NS (Name Server)
PTR (Pointer)
SOA (Start Of Authority)
SRV (location of service)
TXT (Descriptive text)
Let’s have a look at some of the above DNS record types in some detail.
A Name: Most basic of all, A record or A Name is the IP address (IPV4) of the computer working as your web hosting server.

CNAME: Canonical names are the records for sub-domains. The CNAME can be any alphanumeric, such as www, ww1, mail, forum, etc. The value of a CNAME can be a domain name or an IP address. Here’s an example of a CNAME record where www.example.com points to the same website as domain example.com: www as the CNAME with value “@” or “example.com”. The symbol @ represent the root domain – example.com in this case.

Let’s say we want a forum website to run independent of the primary website hosted on another server, but on the same domain. In this case, we can create a CNAME record (say, forum) with the value set as the IP address of the server where our forum will be hosted.
ALIAS: Like any alias, it is just another name. An alias domain makes the same resources available under two domain names. For instance, example.com can have an alias set as example.org. In this case, example.org will show the website at example.com while the browser URL remains as example.org.
NS: Name server is the record that assigns the server responsible for handling all the domain requests and guiding them to your web servers (and other services).
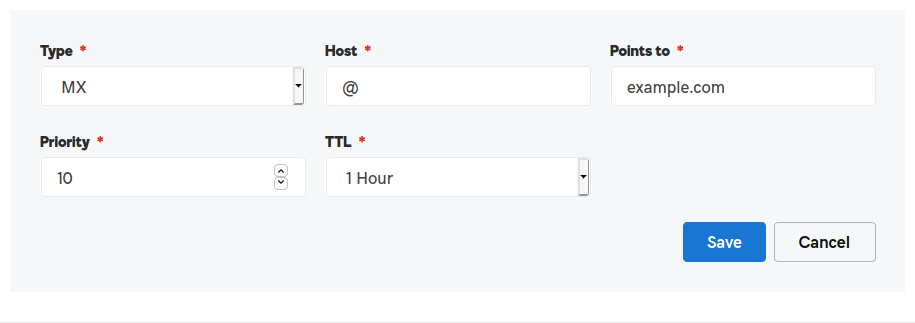
MX: Mail Exchange is the IP address or domain name of the email server for your domain. Generally, your email server is also located on the same computer as your web server. Hence, the MX entry value is set as the domain name (example.com) or the IP address of the machine.
Each name server communicates with others across the web. Whenever DNS records for a domain are added or updated, the update is shared with other name servers. Any change in DNS takes a few minutes to a couple of days to get reflected globally. This process is known as DNS propagation.
Change the Name Servers of Domain
Each domain has at least two name servers, which can be provided by your domain registrar or your website hosting provider.
You need the correct DNS records so that requests for your website (and related services) reach the right computer and get handled by the designated servers.
Tinkering with IP addresses and DNS records can be pretty daunting. To make life easier, hosting providers assign name servers to connect your domain with their computers. All the necessary DNS records for your domain are already added to their name servers. You change the name server entries and the website becomes available (of course, after the name server gets propagated).
If you register your domain from a registrar and buy hosting from another company, your domain name and web hosting space are not configured. However, changing the name servers for any domain is pretty straightforward.
Let’s see how to change the name server of a domain in Godaddy. We will replace Godaddy name servers with the ones provided by your hosting company. The process is similar for all other registrars.
Log in to your domain registrar (Godaddy) dashboard and go to the page that lists all your domains (My Domains / Domains).
Navigate to the domain for which you want to change the name server. Locate the Manage DNS link on the domain page. Different registrars provide these settings under different names.
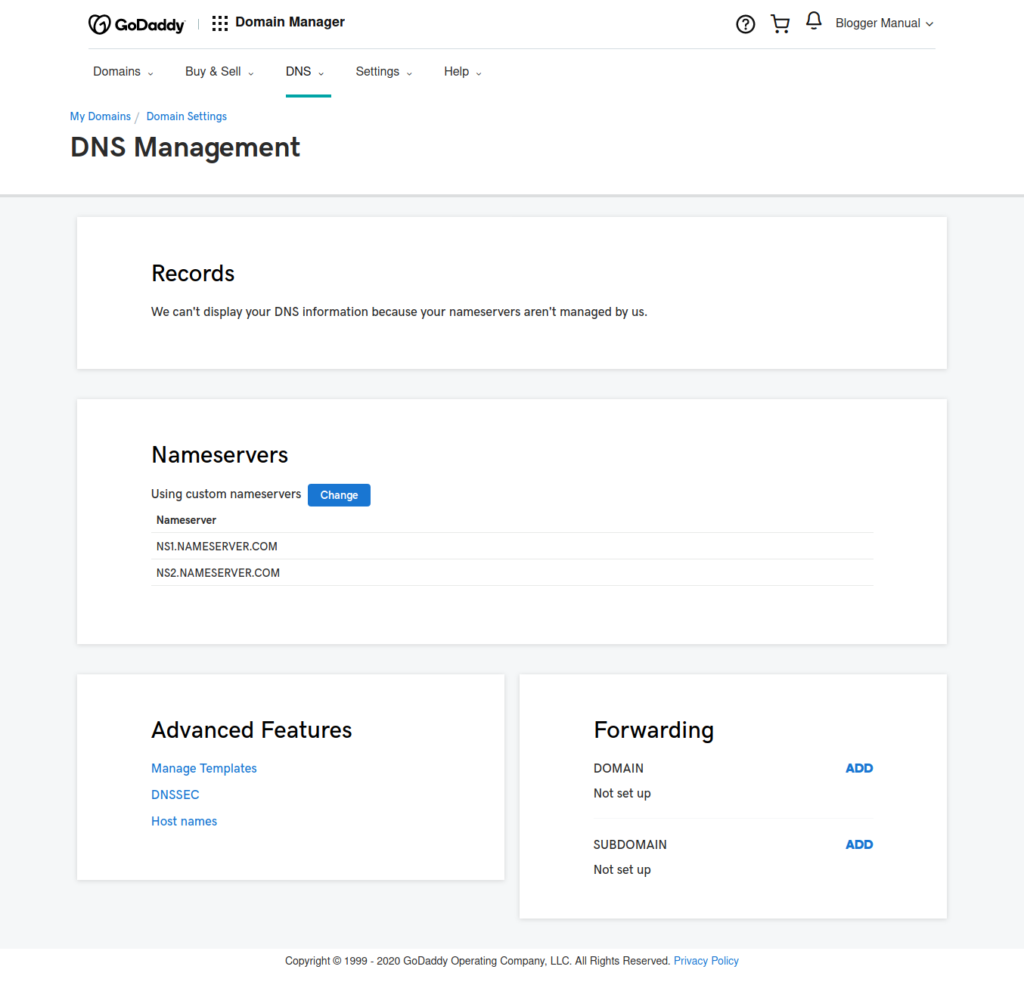
On the domain’s DNS management page, look for the Nameservers section.
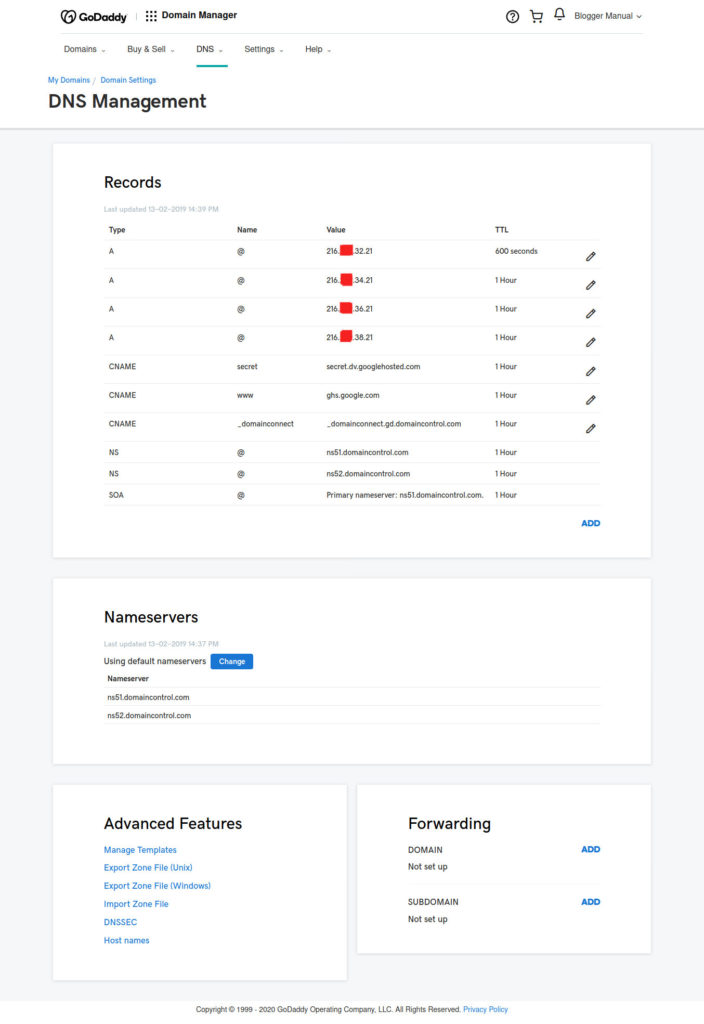
Click on the “Change” button (some registrars include an Add button).
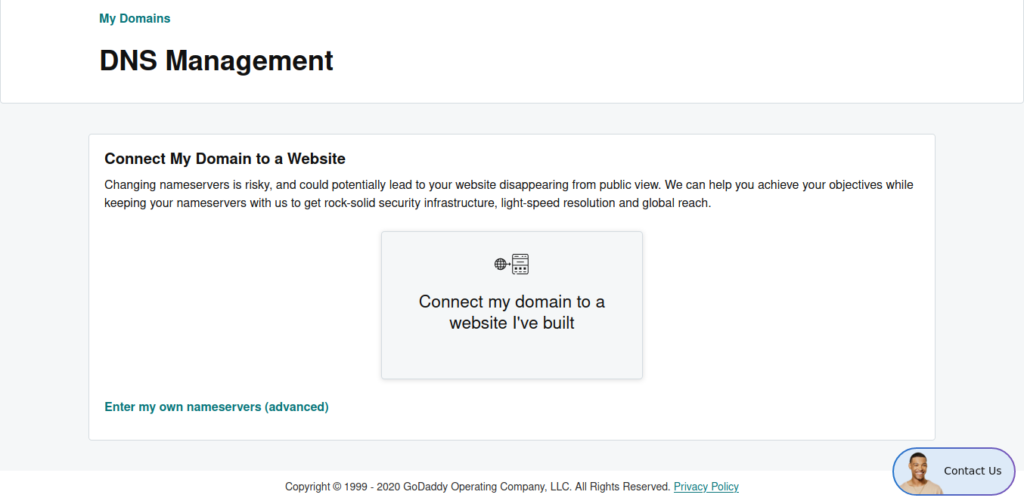
In Godaddy, you will find another page prompting you to “Connect My Domain to a Website”. Ignore the large button and locate the small link – “Enter my own nameservers (advanced)”. Click on it.
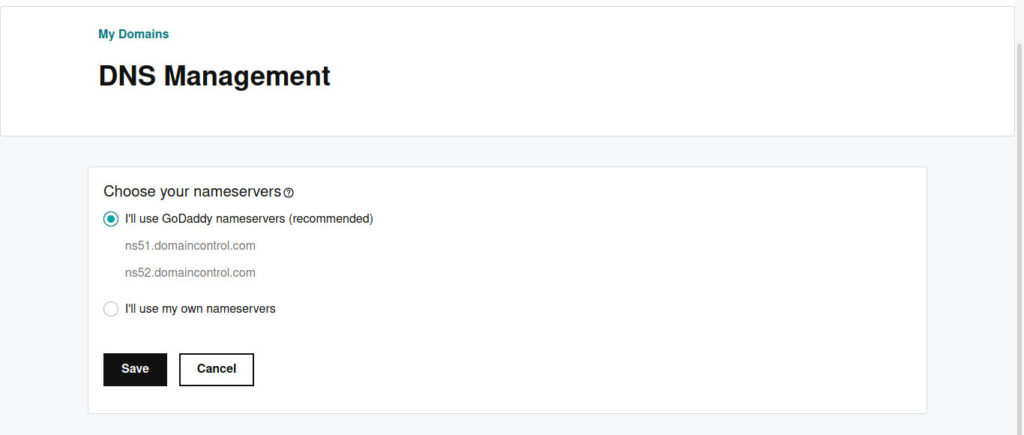
In some versions, Godaddy directly takes you to a page where you can add your own nameservers.
Once you are presented with the option to add name servers, enter the new name servers. If there are any old entries, delete them after adding the new ones.
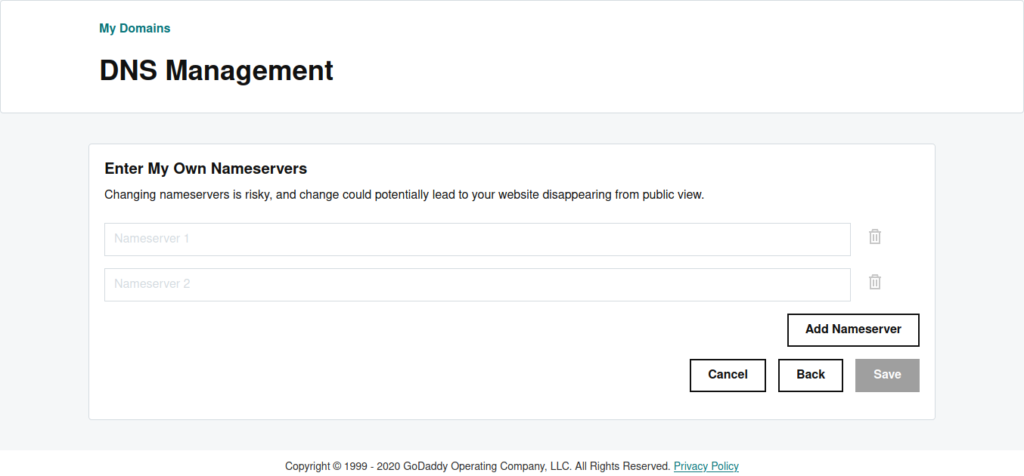
To ensure functioning at all times, each domain has a minimum of two nameservers. Occasionally, there are more than two nameservers for even better reliability. You can add as many NS records you want.
Make sure that you enter the NS records correctly. Double check and hit save.
At this point, you you have successfully change your domain’s name servers, but it won’t reflect immediately. You will continue to see the old site until DNS propagation is complete. Allow a few minutes and try visiting your website.
If the domain name servers have been propagated, you will see your website (if already present on your hosting), a default page or a parking page. Error messages are common too. You can see a blank or error screen if the domain is not added to the web server. Similarly, 403 (forbidden) or 404 (not found) errors occur if the files are missing or permissions are incorrect.
Don’t panic if you don’t see your new site immediately. It can take a while for the name severs to get updated globally. If you can’t reach your new site, try deleting your browser cache too.