
Rookie bloggers often use free Gmail, Yahoo or Hotmail email address for their blog. Why not create email address with your own domain name? In this article, we will learn how to get your own website-branded email address for your blog.
Free email accounts from Gmail is great, and you can also use the associated Google account for other services such as Google Analytics, Google Webmaster & Search Console. But does it make you look like the pro blogger you want to become?
Big companies don’t use free email accounts. Instead, they use their own email addresses with their own domain names. Having own setup for emails gives them control over their data, and also makes them appear professional.
If you have your own domain and web hosting, you can create your own custom email address too. Stop using free Gmail address and switch to your own custom email address.
Create Email Address with Own Domain
Most web hosting companies use cPanel hosting manager to provide hosting services and admin dashboard to their customers. Some may use their own hosting dashboard.
All good web hosting companies allow you to create and manage email addresses with your hosted domains.
Newbie bloggers with no previous experience are unaware that they can create own email with domain names at no EXTRA cost. It’s a free service that you can set up with your hosting. (If you hosting company doesn’t allow this, you need to find a better service provider.)
For this article, we will assume that your hosting company is using cPanel (control panel) as you hosting dashboard. It’s true for many popular hosting companies such as Bluehost.
If you don’t have your own hosting yet, why not buy it from Bluehost with an exciting offer (affiliate link). [Disclosure: When you use my link to buy hosting from Bluehost, I earn a commission at no extra cost to you.]
1. Access your web hosting cPanel
When you purchase web hosting, your hosting company provides you with the details about your hosting. Some of the information provided includes your web hosting server’s Internet Protocol (IP) address, nameservers, cPanel account username and more.
Log in to your web hosting’s cPanel. In almost all cases, it can be accessed by visiting any of the following URL formats, with your website domain instead of example.com.
- http://example.com/cpanel
- http://cpanel.example.com
- http://example.com:2083
Don’t confuse your web hosting account dashboard with cPanel. cPanel only manages you hosting. In contrast, your hosting account dashboard is where you manage your orders, invoices, payments, profile, etc.
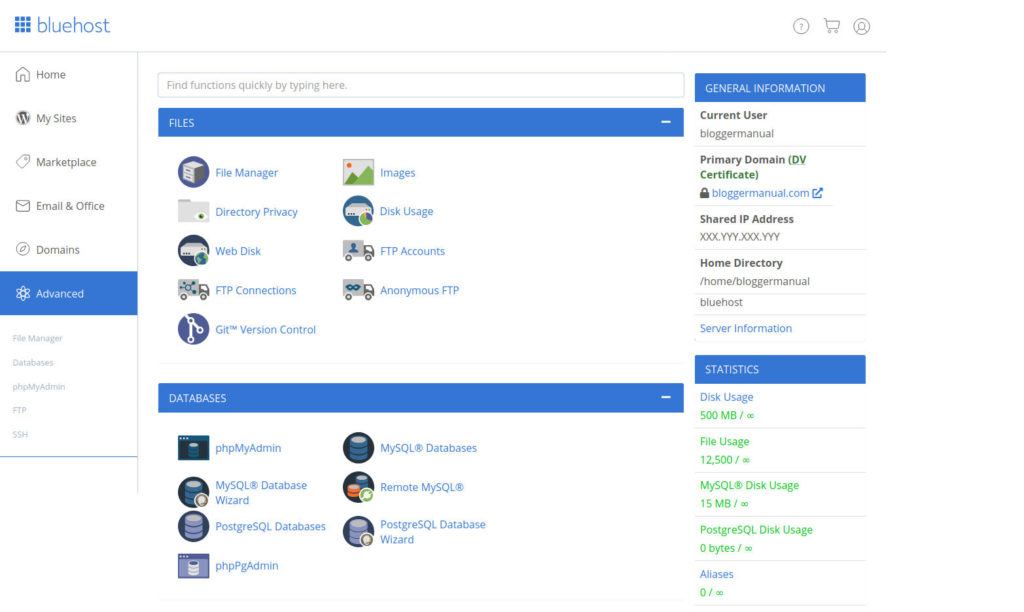
If your website is hosted on Bluehost shared hosting, you can log in to you hosting dashboard and click on the “Advanced” menu to open cPanel.
Some hosting companies do not use cPanel. In such a case, you simply log into any custom dashboard provided or use the account dashboard to manage the hosting functions.
2. Use cPanel to create email account
In cPanel, locate the Email section, which hold all the settings for email management.
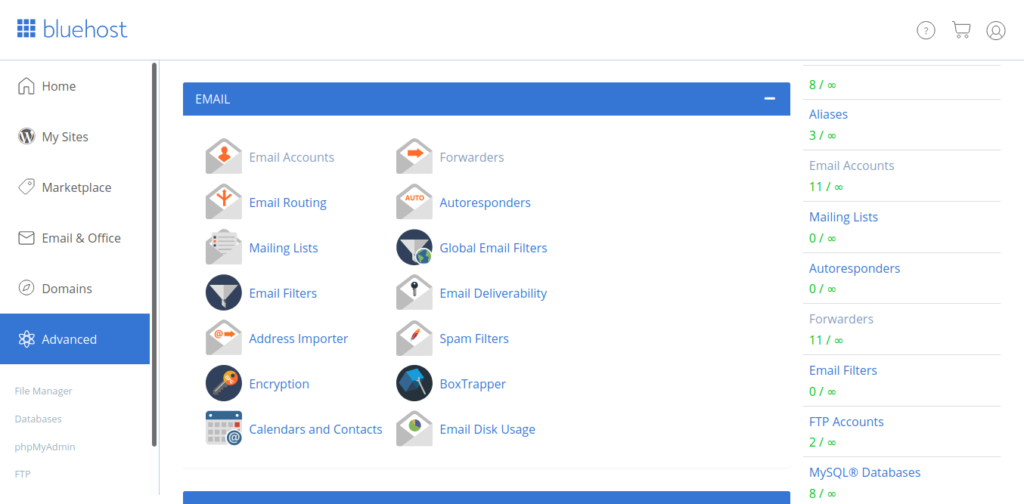
Click on the “Email Accounts” icon (link). The resulting page lists all email accounts associated with your hosting. You can check email, manage or connect email with your device (Outlook, email mailbox application) from here.
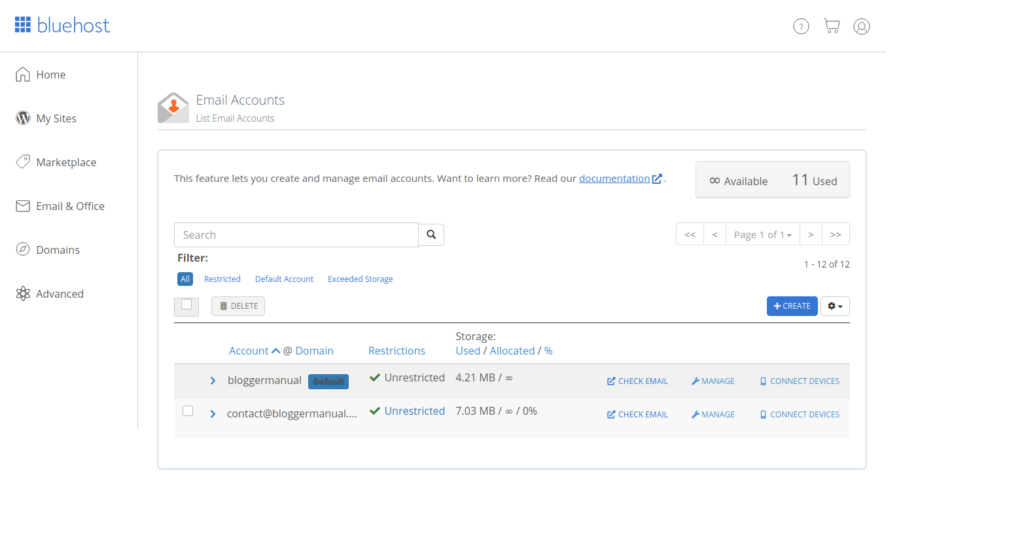
On top of the email accounts list, look for the “Create” button.
Click on the “Create” button, and open the page to “Create an Email Account” with your own domain.
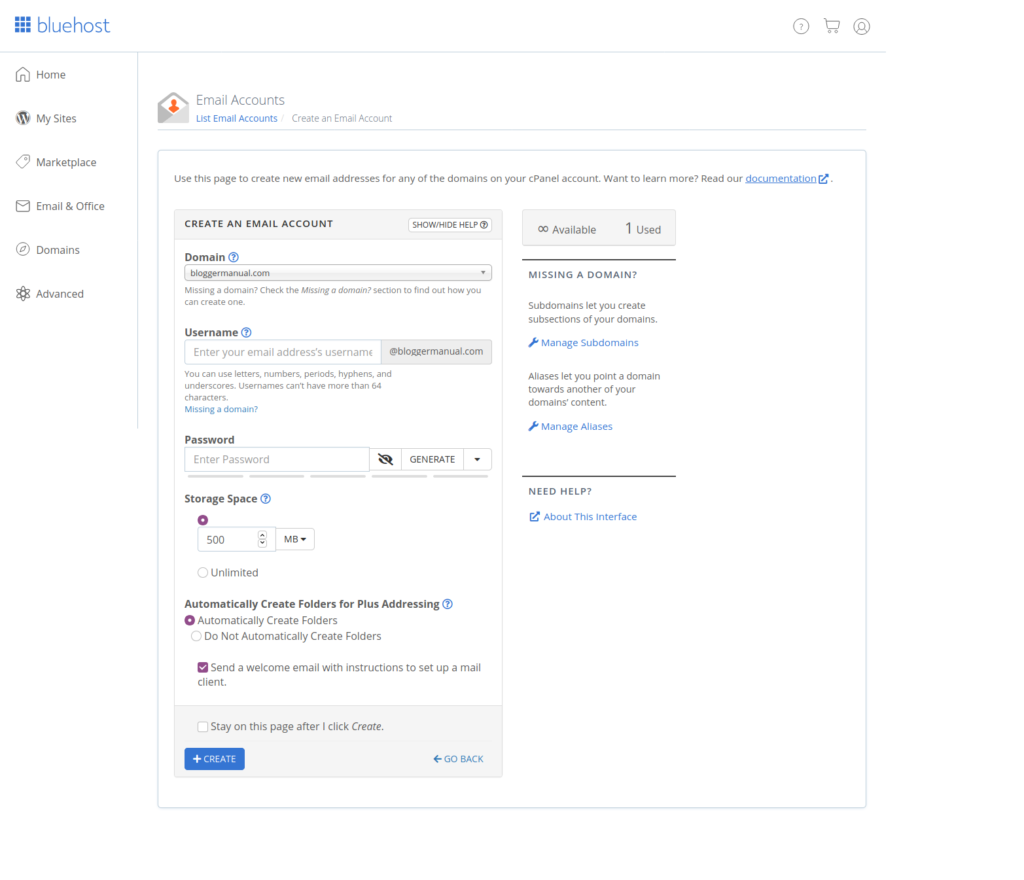
Select the domain for which you want to create the email account. Nothing to do if the hosting is only associated with one website / domain.
Add the username for the email account (eg:”contact” for [email protected])
Enter a strong password for the email account, or use the password generator. Save this email password before you proceed.
Select the storage space that you want to allocate to the email account. Select “Unlimited” or set the quota.
Leave the option selected, unless you don’t want “Send a welcome email with instructions to set up a mail client”.
Click on the “Create” button, and you are done.
3. Check your own domain email
For web hosting with cPanel, the email accounts have a webmail system. Unless changed by your or your hosting provider, it can be accessed by visiting any of the following URL formats, with your website domain instead of example.com.
- http://example.com/webmail
- http://example.com:2096
When you access the webmail URL for your website, a login option will appear. You should enter your complete email address as the user and use the password you selected at the time of creating the email account.
On the next page, select the desired email program to access your email. Squirrel Mail is a simple and clean online email client. Horde performs more like common email clients.
4. Manage your email accounts
When you have emails hosted on your own hosting, you also need to manage it. Forgotten email passwords or deleting an email account are some common things that you may need.
You can manage self-hosted email account via cPanel.
Log in to your hosting cPanel, and locate the Email section.
Click on the “Email Accounts” icon (link). The resulting page lists all email accounts associated with your hosting. You can check email, manage or connect email with your device (Outlook, email mailbox application) from here.
To change password, delete account or modify the space allocation, click on the manage button next to the email account you want to configure.
5. Forward email address to another email / Gmail
In cPanel, you can forward email addresses to any other email on your own domain or elsewhere.
You can forward your own domain email address to your Gmail or Hotmail email account, and avoid the need to check one extra email address.
To set up forwarding for an email account, log in to cPanel of your hosting.
Locate the Email section, and click on the “Forwarders” link / icon.
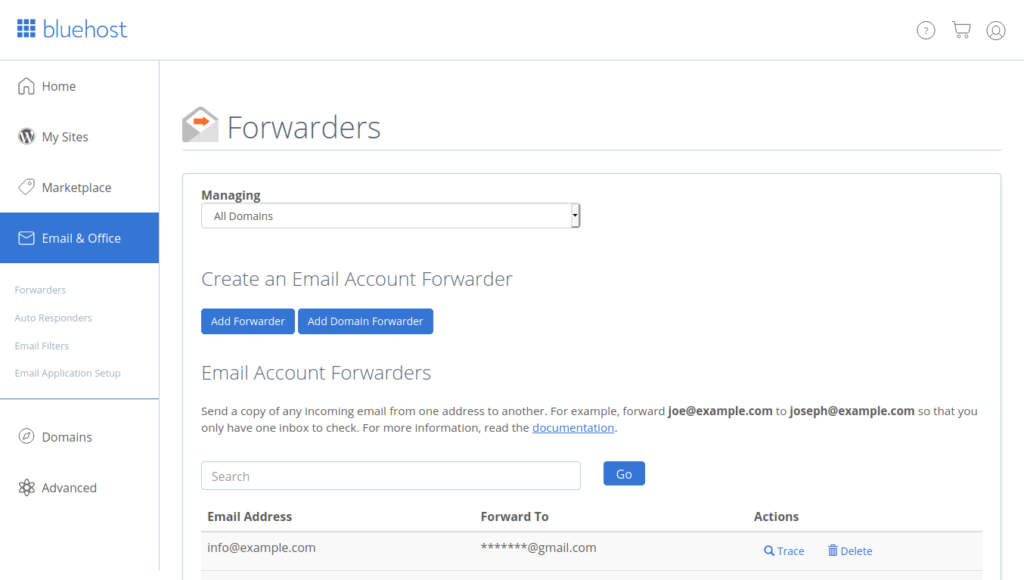
On the Forwarders page, you will find the existing email forwarders listed, just below the buttons to create new forwarders.
Ignore the Add Domain Forwarder button, which basically moves all emails received on one domain to another.
Click on the Add Forwarder button to forward an email hosted on the system.
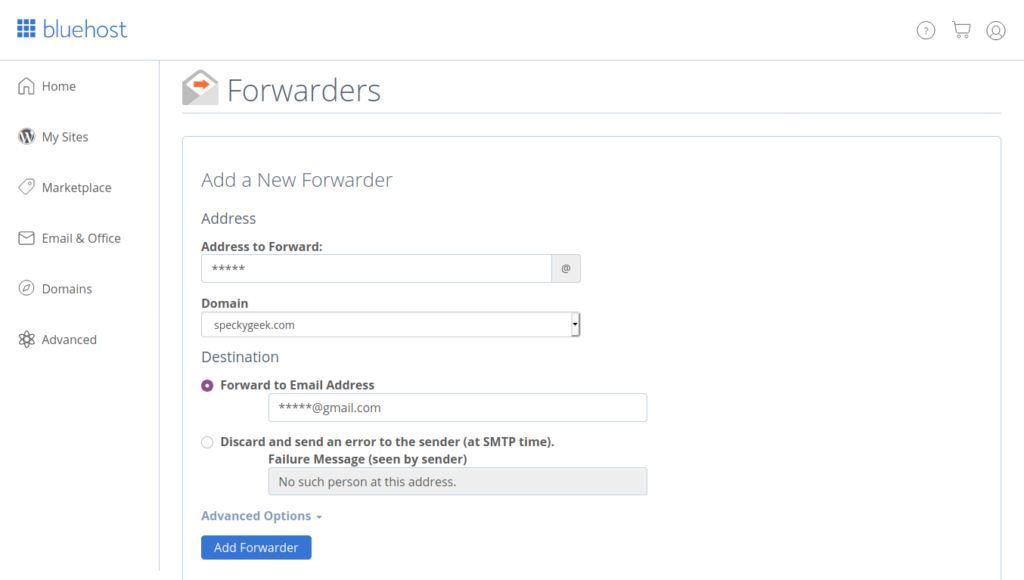
Enter the email username in the address to forward input option, and select the appropriate domain.
Next, enter the email address where you want the emails to be forwarded. It can be your Gmail, Yahoo, Hotmail, self-domain email or any valid email address.
Click on the “Add Forwarder” button to save.
Forwarding email address to Gmail or any free email provider may lead to spam filters getting triggered. If your email address is getting in spam (check), mark it as not spam.
Add your email address to your contact book. Gmail will learn that the email address is important to you, and will start delivering emails to your inbox.